ASP.NET(1.WebForms) 基本使用
简介
ASP.NET 是微软公司推出的 基于 .NET Framework 的web开发平台,是一门强大的服务端技术,能够快速构建web应用程序,极大的提高了开发效率
创建项目
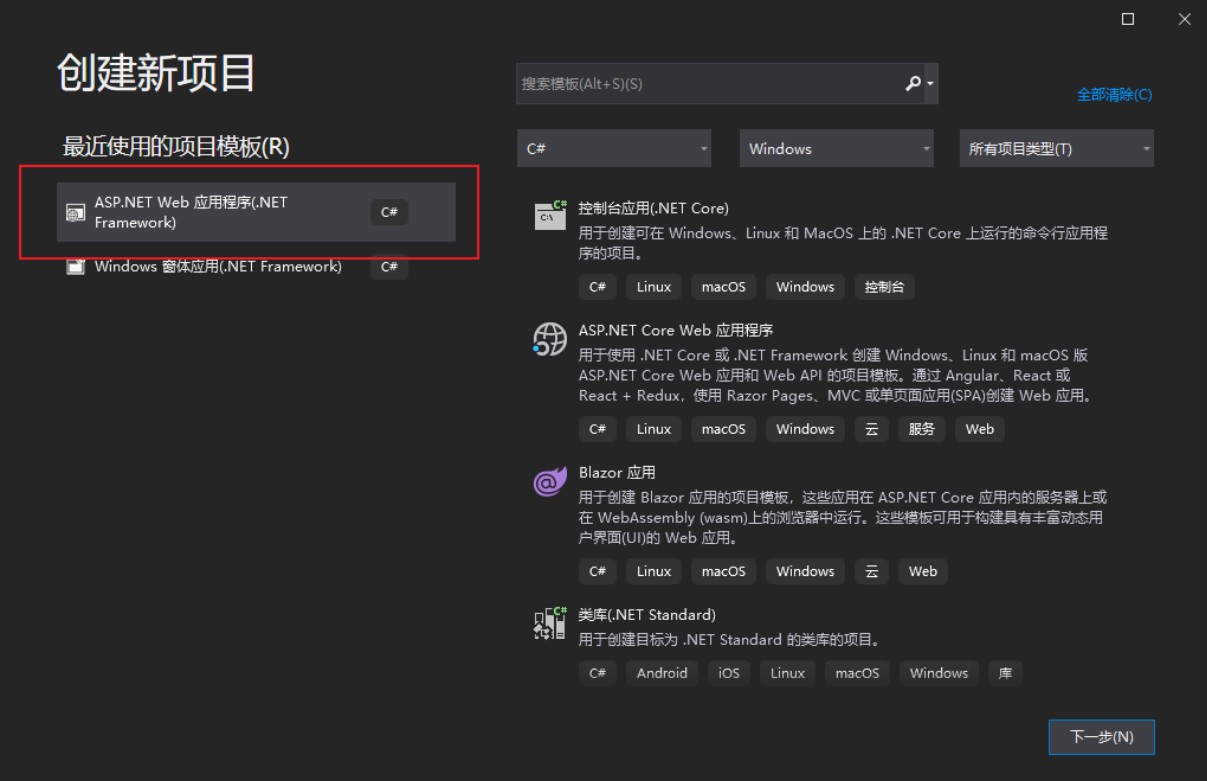
打开 Visual Studio,创建 ASP.NET Web应用程序,并选择创建空项目
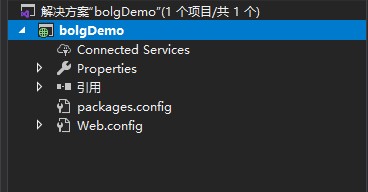
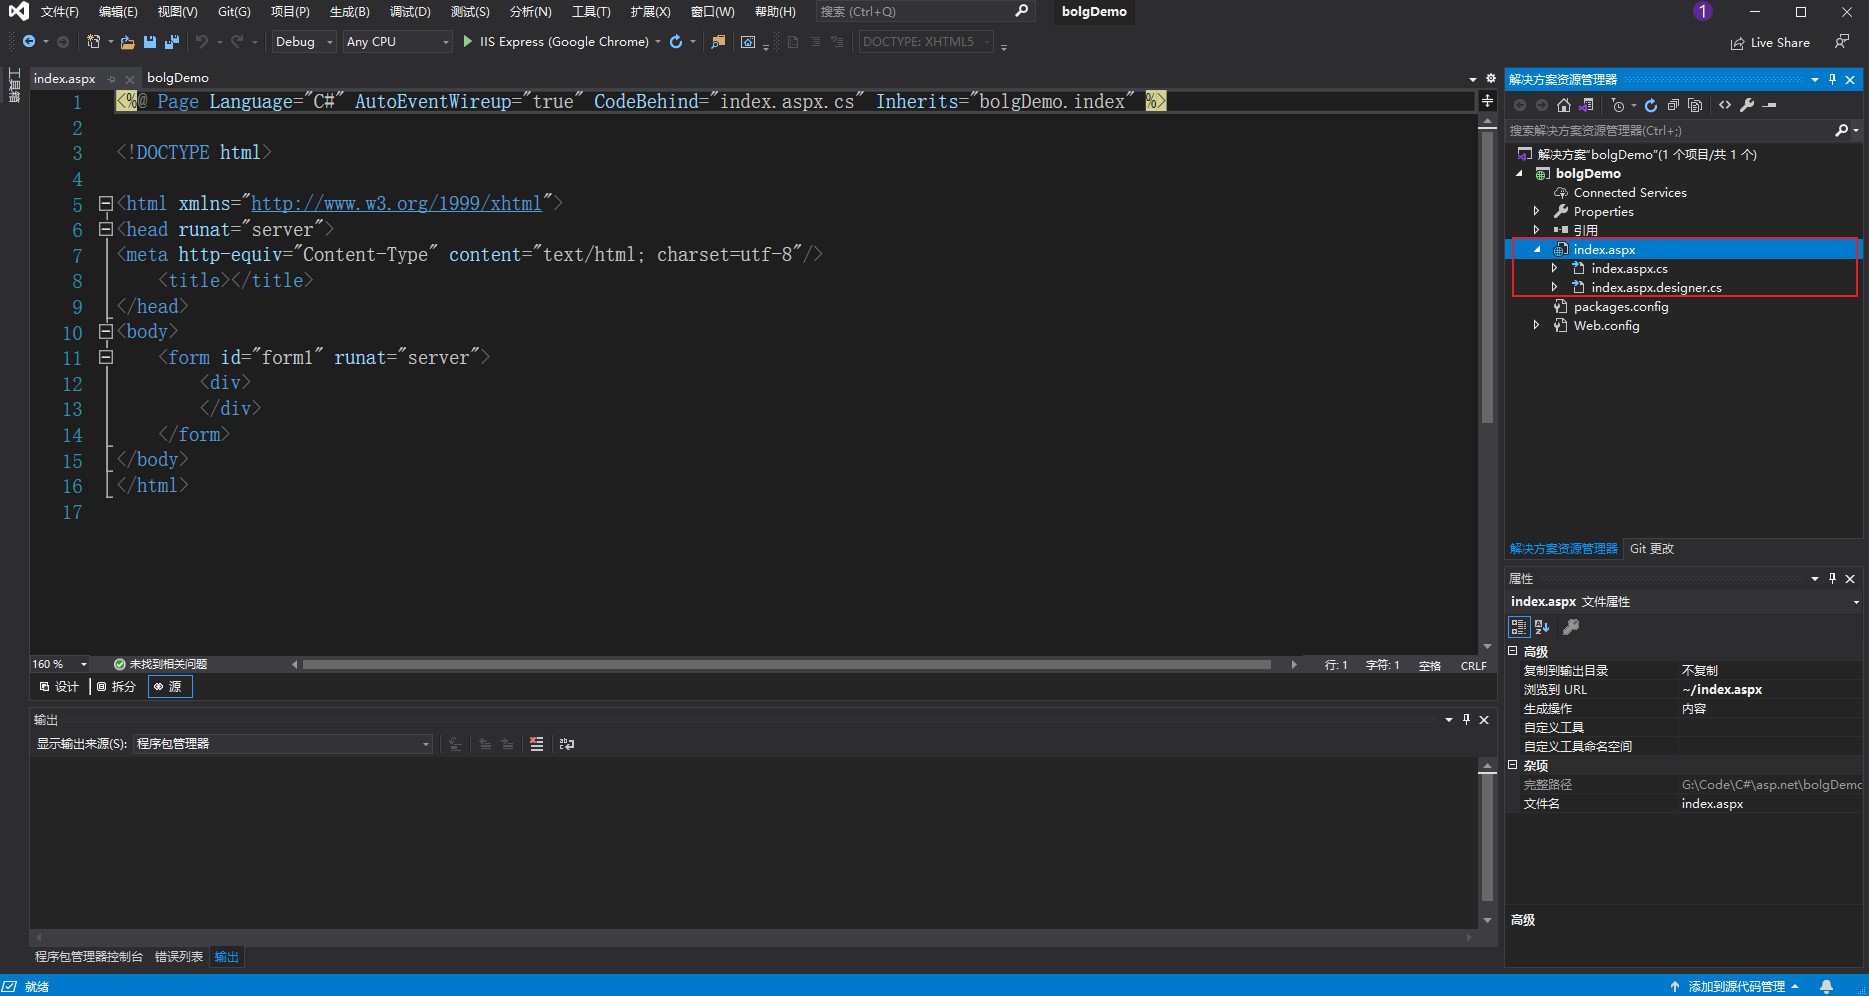
得到以下目录
右键项目,点击添加web窗体
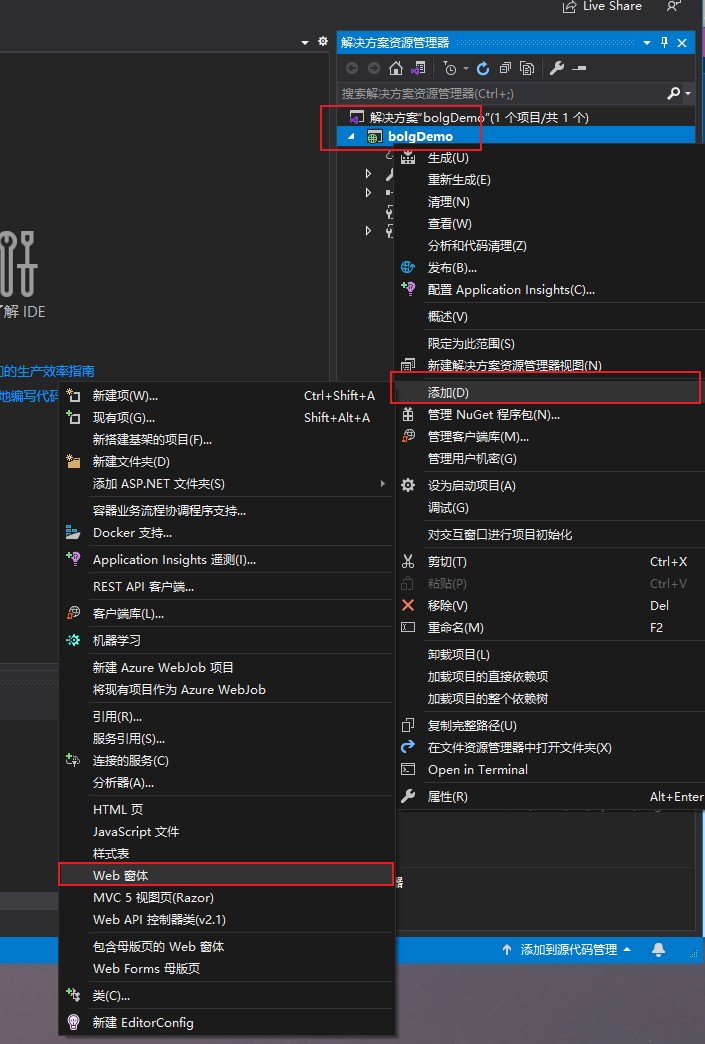
此时,就得到了我们的窗体对应的文件, index.aspx文件是我们的客户端页面文件,可以在里面编写html代码和chsarp代码来构建页面;index.aspx.cs 是服务端文件,可以在这里处理客户端的事件数据;index.aspx.designer.cs 是该窗体的配置文件,一般不对此文件进行修改。
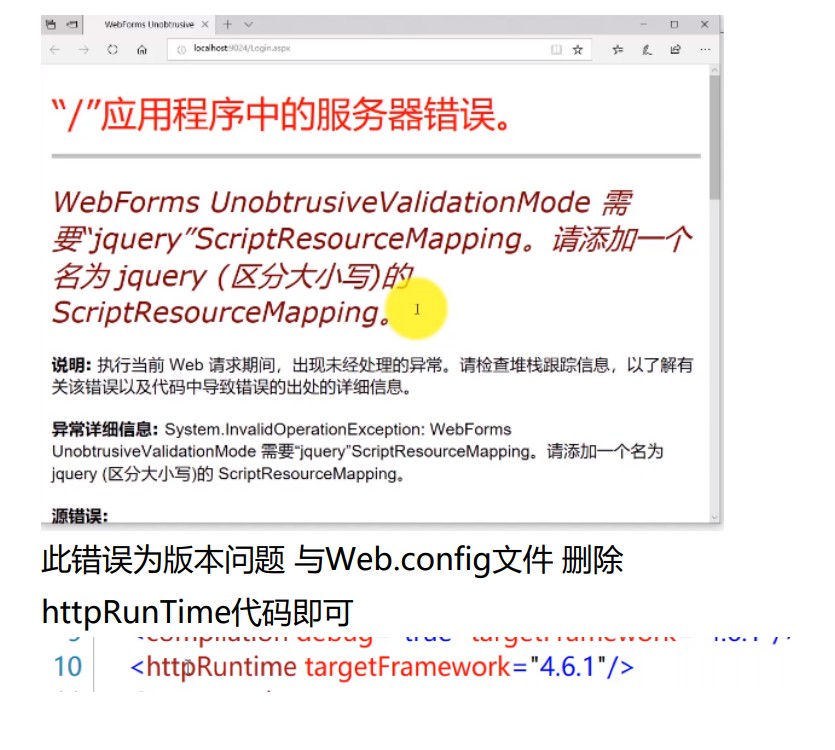
若启动时,遇到此报错信息,在项目根目录下的Web.config 中,删除httpRuntime 代码即可
基本控件
非空验证
在 index.aspx 文件中,打开左侧工具栏 ,搜索 RequiredFieldValidator 控件,并双击添加进页面
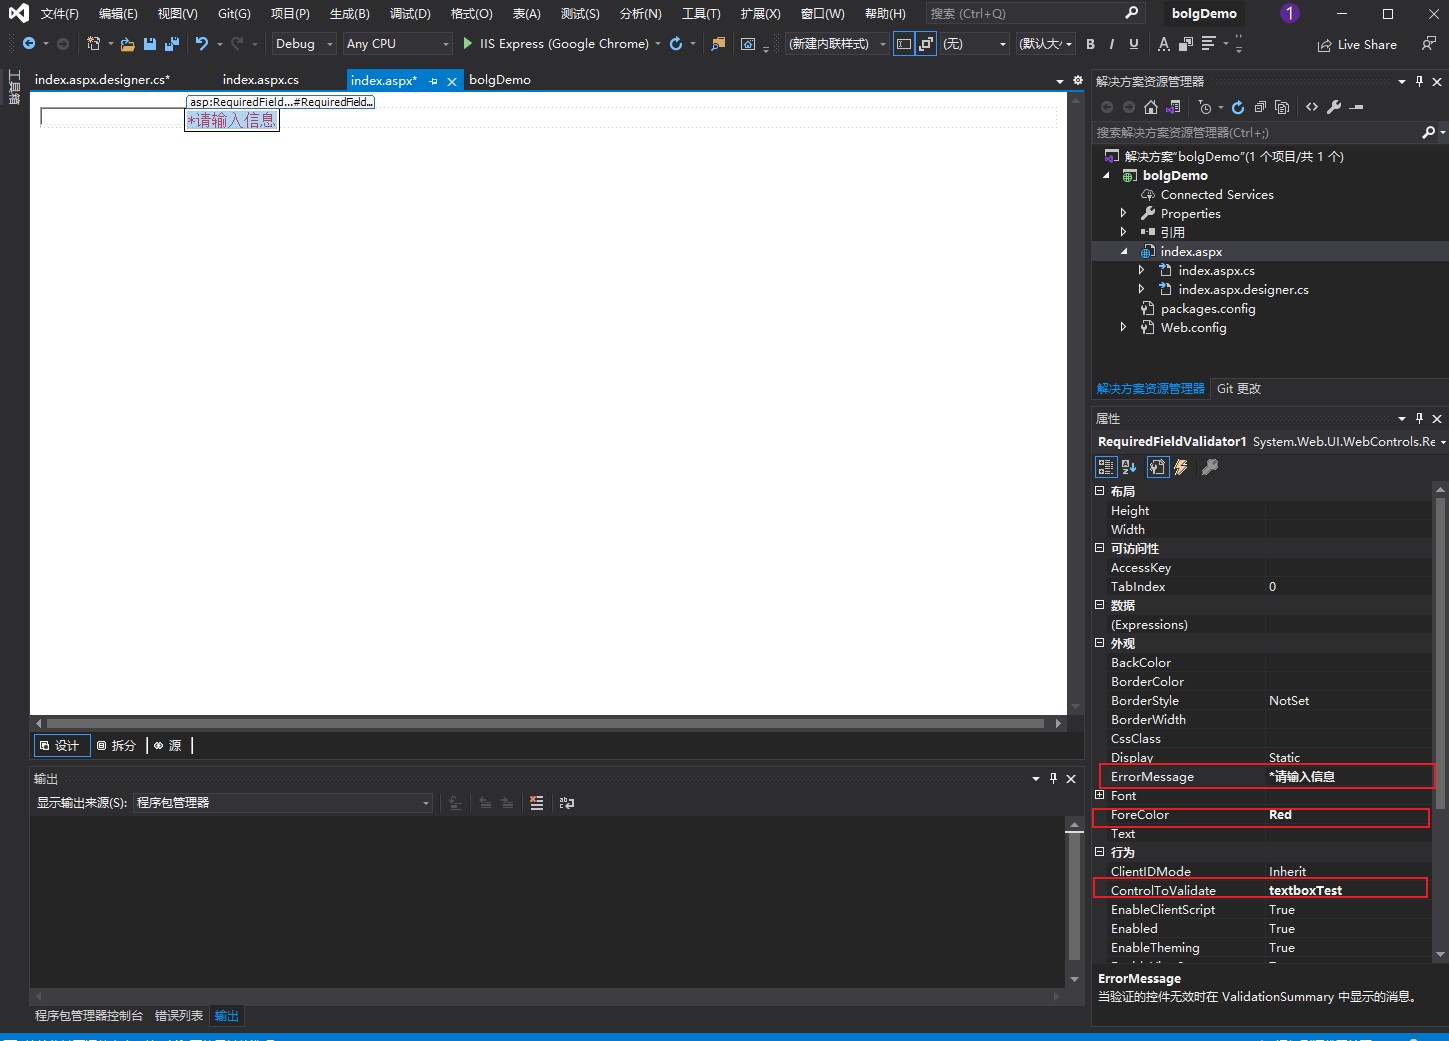
点击它,并在右下角属性面板中进行一些设置
ControlToValidate: 此非空验证控件与哪个控件进行绑定,值为被绑定控件的 ID值
ErrorMessage: 当非空验证绑定的控件值为空时,激活控件,并显示它的 ErrorMessage
验证是否一致
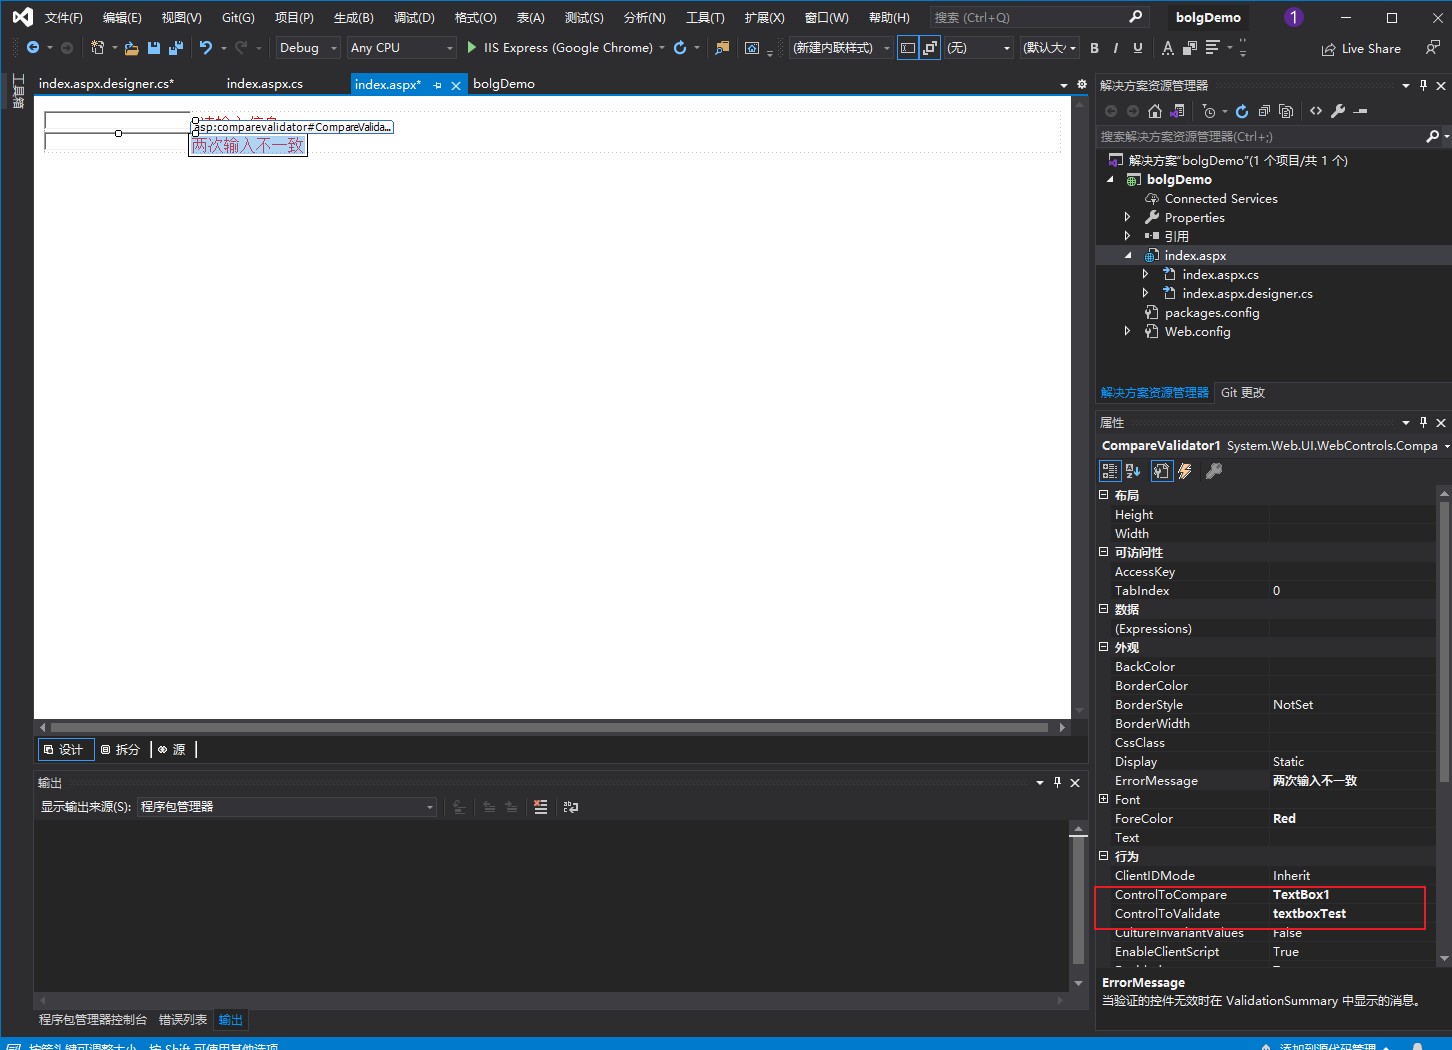
搜索 CompareValidator 并添加
使用 ControlToValidate属性 和 ControlToCompare属 性 绑定两个控件 值就为控件的ID
正则表达式验证控件
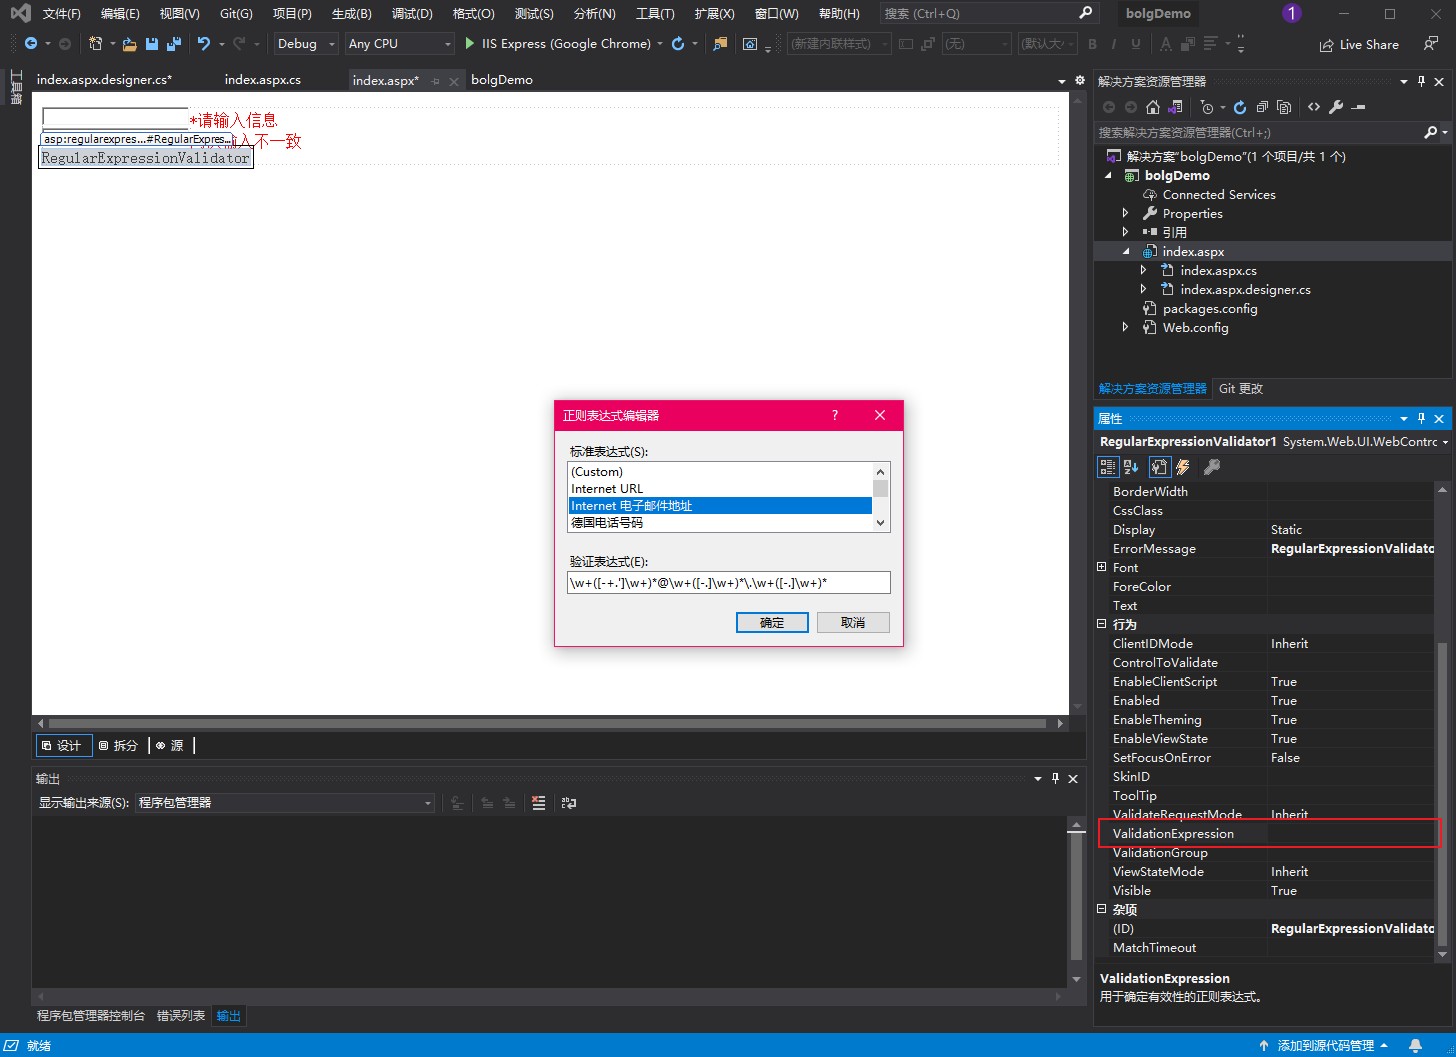
搜索 RegularExpressionValidator 并添加
ControlToValidate: 需要验证控件的id值
ValidationExpression: 用于验证的正则表达式,可以使用自带的,也可以自定义
自定义验证控件
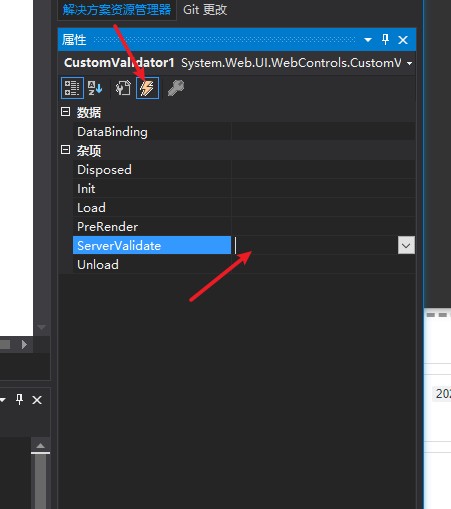
搜索并添加 CustomValidator
ControlToValidate: 需要验证控件的id值
点击事件,并双击 ServerValidate 生成函数处理验证内容
1 | protected void CustomValidator1_ServerValidate(object source, ServerValidateEventArgs args) |
高级控件
母版页与内容页
右键项目,添加 Web Forms 母版页
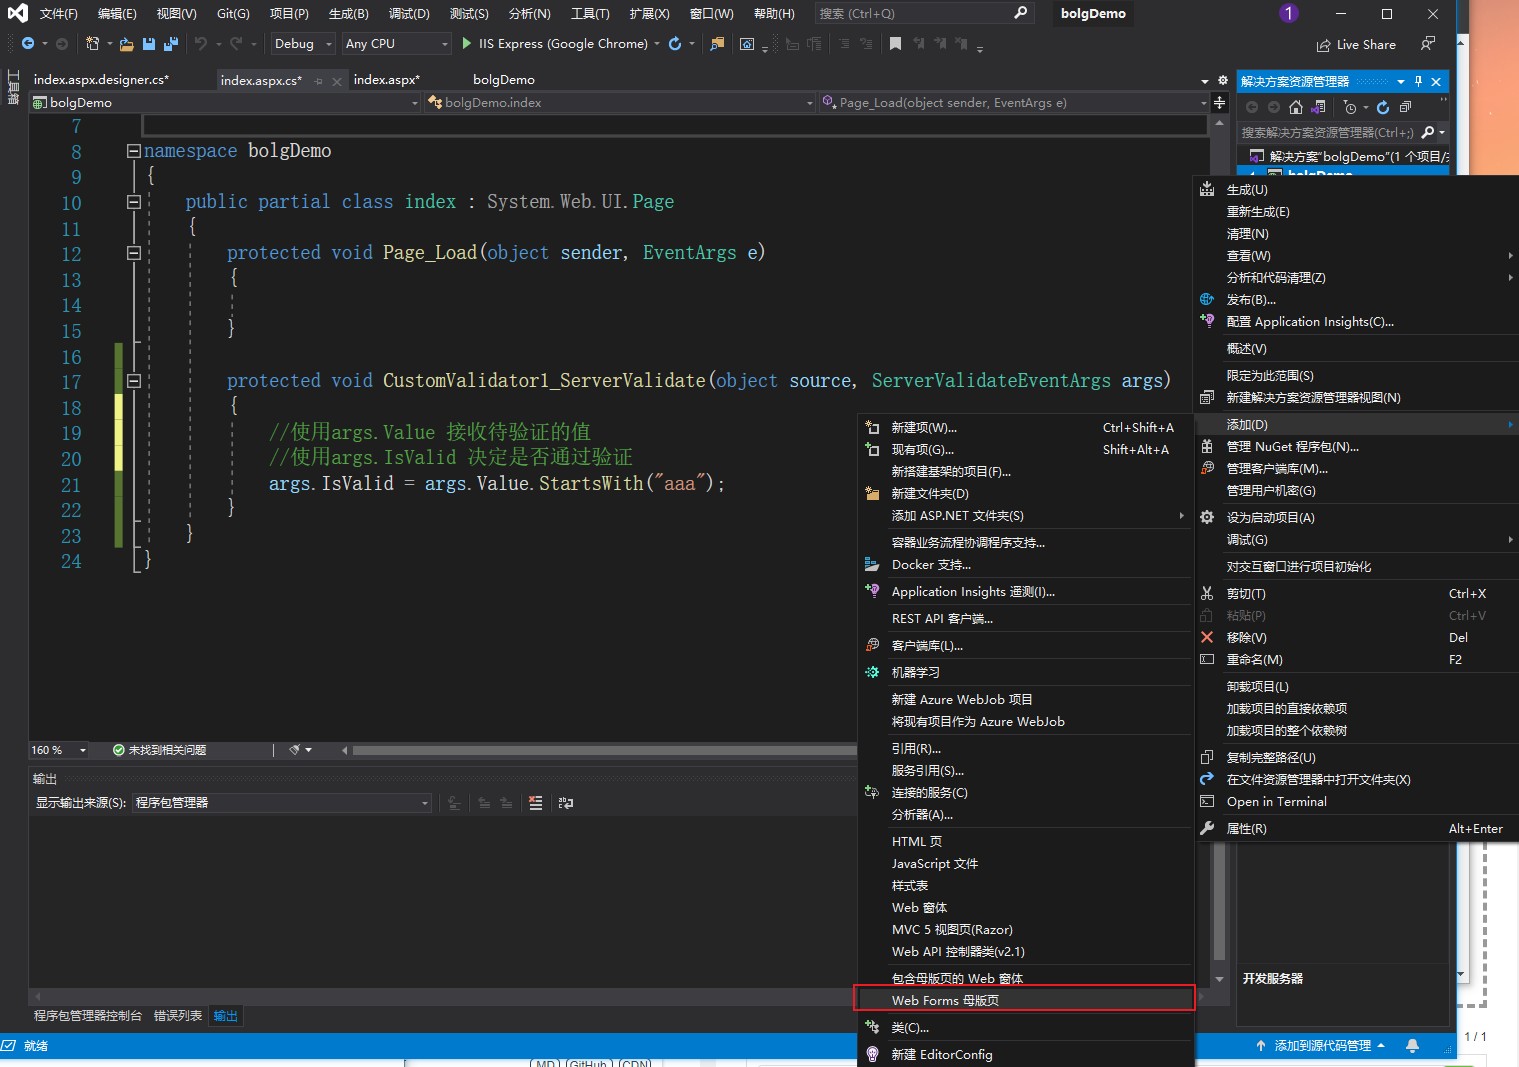
此时会生成 .Master 文件,其中的 ContentPlaceHolder 就是模板占位符,母窗体会自动寻找下属的子窗体,并将对应的 ContentPlaceHolder值的 子模板填入该位置
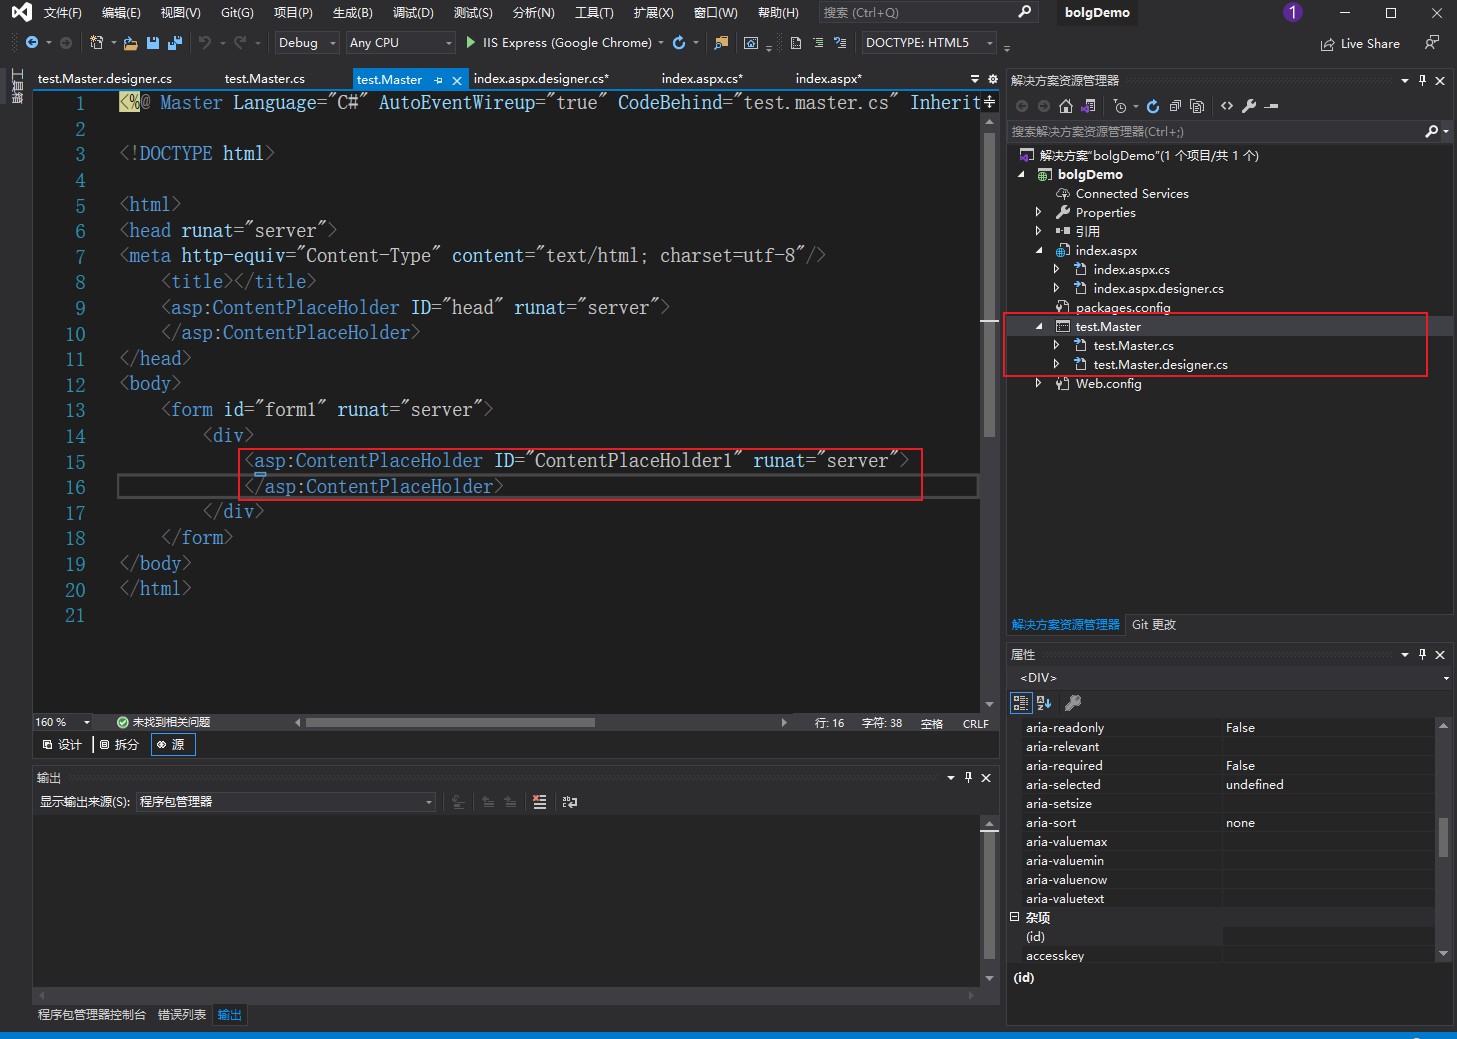
右键项目,添加子模板页
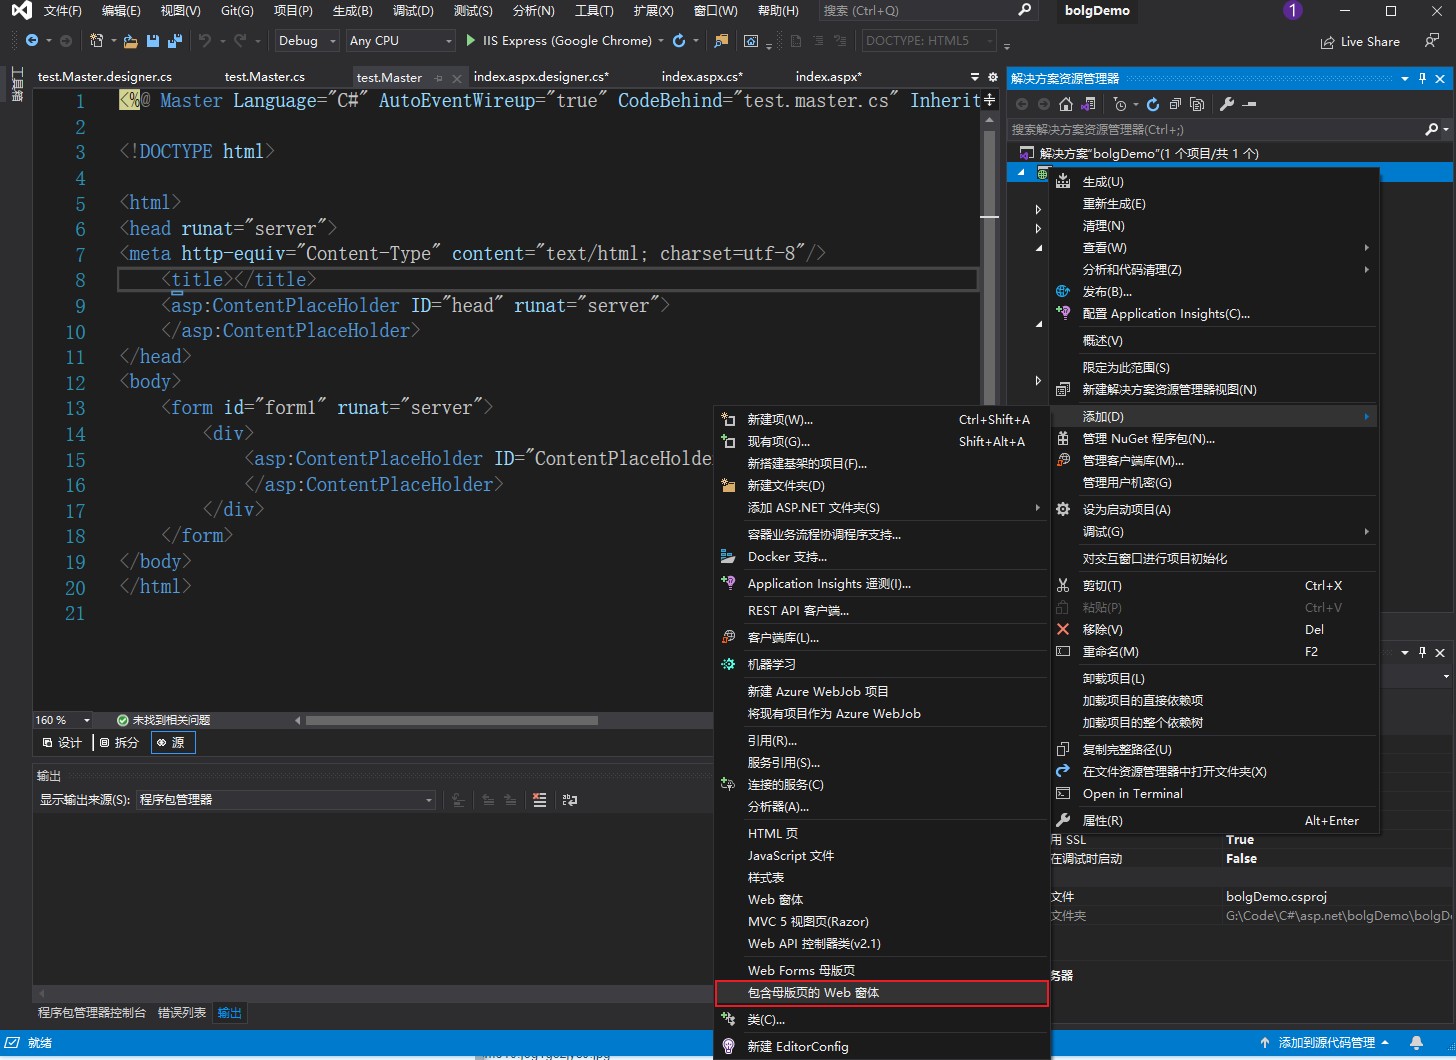
选择它的 母版页
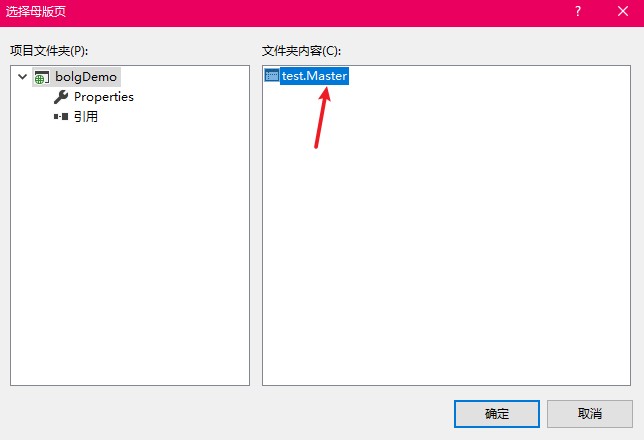
可以看到,子模版页的 ContentPlaceHolder 与 母版页 ContentPlaceHolder 相对应,子版页就可以插到母版页中

注意:在子版页中,只能在 <asp:Content> </asp:Content> 标签中书写内容
文件上传控件
搜索并添加 FileUpload,并在下方添加一个按钮,双击击该按钮进入点击事件,来处理上传的文件
1 | protected void Button1_Click(object sender, EventArgs e) |
文件下载
(待下载的文件必须是 zip 压缩包格式)
- 使用a标签直接下载,其路径为服务端文件路径
1 | <a href="downloadFile/demo.zip"> |
- 点击按钮,生成点击事件下载
1 | protected void Button2_Click(object sender, EventArgs e) |
系统对象
page 对象
IsPostBack 判断是否回发 页面是否是第一次加载
1 | protected void Page_Load(object sender, EventArgs e) |
Respons 对象
1 | protected void Page_Load(object sender, EventArgs e) |
Request 对象
1 | <div> |
1 | protected void Page_Load(object sender, EventArgs e) |
1 | <form id="form1" action="index.aspx" method="post"> |
1 | protected void Page_Load(object sender, EventArgs e) |
页面状态管理
cookie
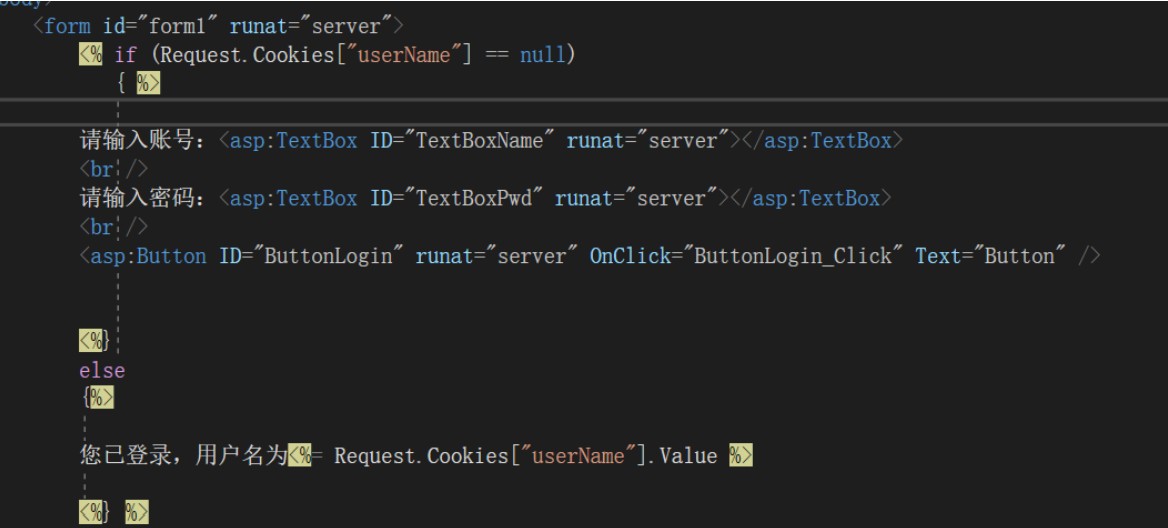
1 | protected void Button2_Click(object sender, EventArgs e) |
在页面中 可以根据cookie值是否存在 而渲染不同的页面 其csharp代码 需用<% %>包起
session
1 | protected void Button2_Click(object sender, EventArgs e) |
1 | protected void Page_Load(object sender, EventArgs e) |
三层架构

controller 层作为与页面相连的一层,用于接收展示数据,再调用service层对数据进行封装处理,再由service层调用dao层,将数据入库
dao 层作为与数据库连接层,查询到数据后,将数据返回给service,service层将数据进行封装处理之后,返给controller,controller层将数据在页面上进行展示
首先创建model 实体类,类中的字段就是数据库中的字段
1
2
3
4
5
6
7
8
9
10
11
12
13
14
15
16
17
18
19
20
21
22
23
24public class ProductModel
{
int productId;
string productName;
decimal price;
string detail;
public int ProductId { get => productId; set => productId = value; }
public string ProductName { get => productName; set => productName = value; }
public decimal Price { get => price; set => price = value; }
public string Detail { get => detail; set => detail = value; }
public ProductModel(int productId, string productName, decimal price, string detail)
{
this.productId = productId;
this.productName = productName;
this.price = price;
this.detail = detail;
}
public ProductModel()
{
}
}创建dao 层 作为数据库连接层,我这里用的是 DBhlper
1
2
3
4
5
6
7
8
9
10
11
12
13
14
15
16
17
18
19
20
21
22
23
24
25
26
27
28
29
30
31
32
33
34
35
36
37
38
39
40
41using System;
using System.Collections.Generic;
using System.Linq;
using System.Text;
using System.Threading.Tasks;
using System.Data;
using System.Data.SqlClient;
namespace Dao
{
public static class DBhelper
{
public static SqlConnection getConn()
{
string sql = "server=.;uid=sa;pwd=123456;database=testDB";
SqlConnection conn = new SqlConnection(sql);
conn.Open();
return conn;
}
public static int exquect(string sql)
{
return new SqlCommand(sql, getConn()).ExecuteNonQuery();
}
public static SqlDataReader getReader(string sql)
{
return new SqlCommand(sql, getConn()).ExecuteReader();
}
public static DataSet getSet(string sql)
{
DataSet ds = new DataSet();
new SqlDataAdapter(sql, getConn()).Fill(ds);
return ds;
}
}
}创建数据逻辑层 service 用于处理数据的封装与逻辑,并将结果retrue出去
1 | using System; |
- 创建 controller 层,作为页面交互层,并于service通信
1 | using System; |
- 在页面中,通过调用controller层,可以进行对数据进行操作
1 | using System; |
数据绑定
DropDownList 控件
在三层架构中拿到数据
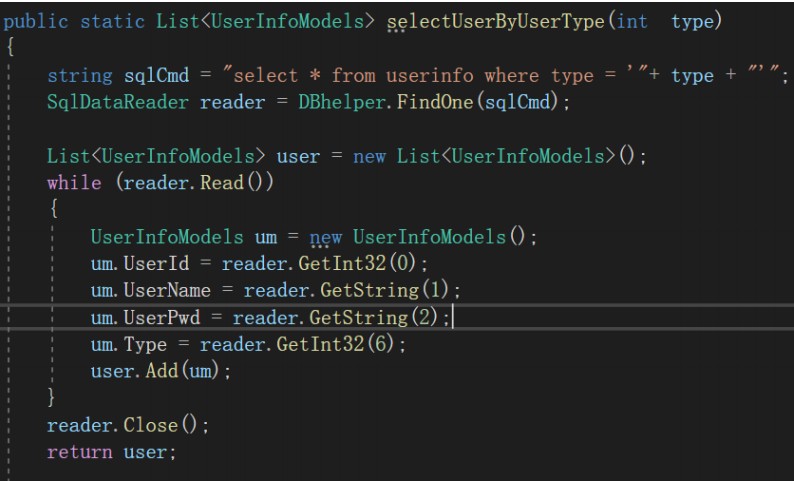
对控件进行赋值

DataList 控件
添加进界面后,点击右上角小箭头设置模板
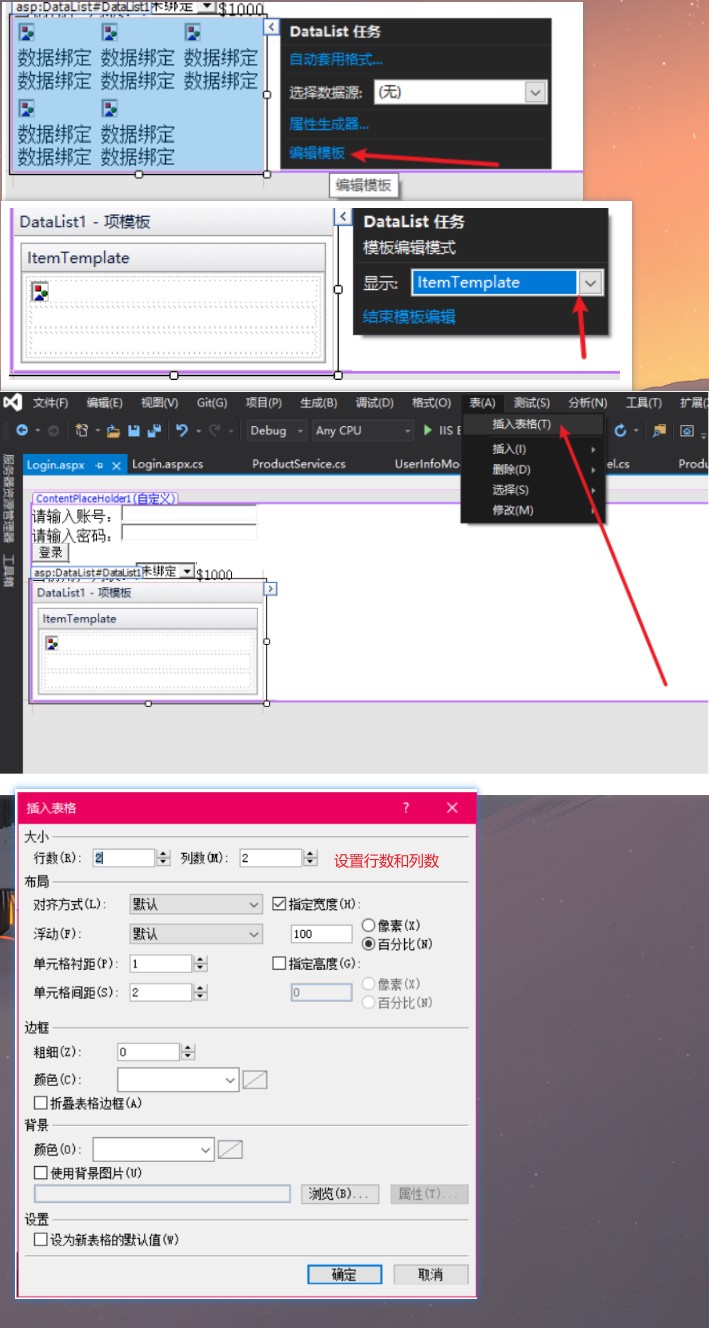
绑定数据

通过表示符 从绑定的数据源里 获取对应属性的值

Repeater 控件
从服务端获取数据 并绑定Repeater控件

使用Eval方法 从绑定的数据源中 获取对应的属性值 赋值 给控件属性

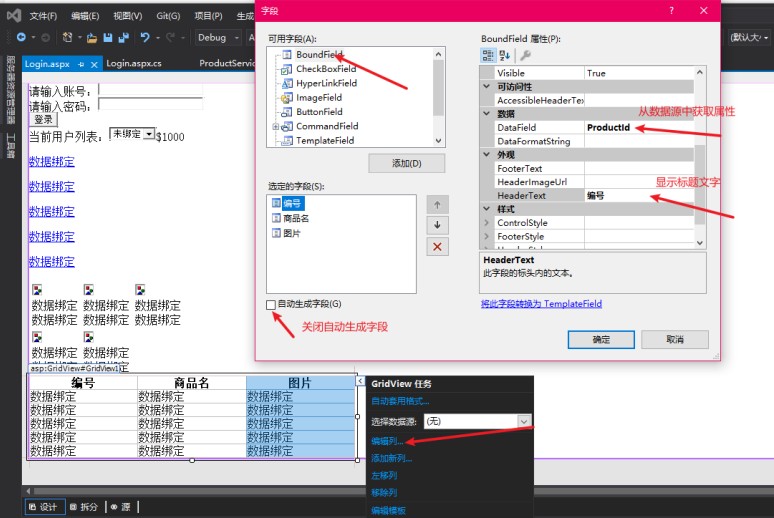
GridView 控件
显示数据
从服务端 获取数据并绑定

点击控件右上角箭头进行设置
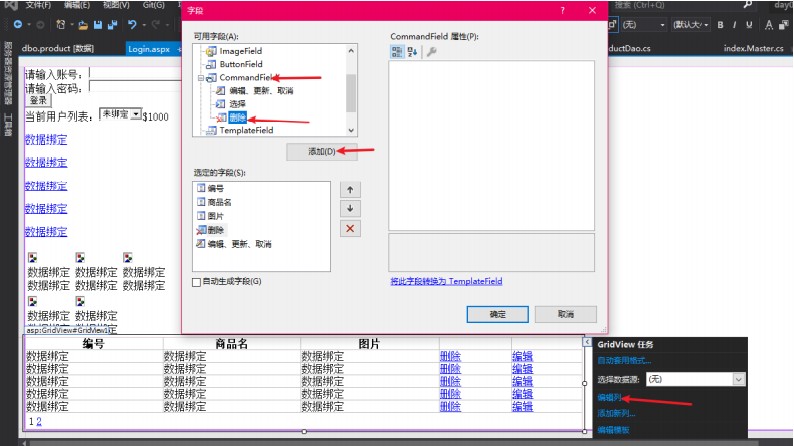
删除
添加删除按钮
生成删除事件
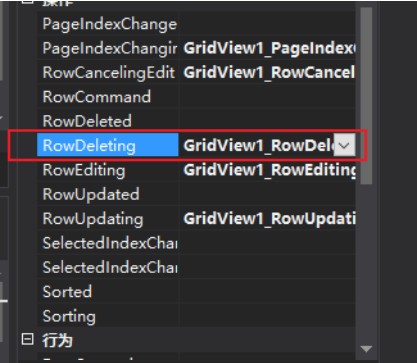
执行删除操作

- 编辑
控件设置方法照上
生成编辑方法,进入编辑界面
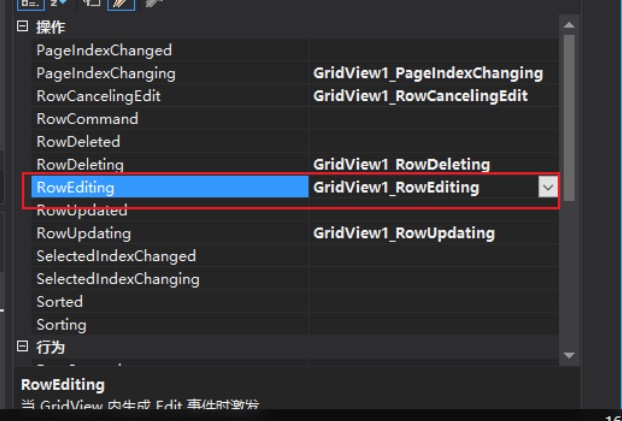

进入编辑界面后 还需生成更新数据方法
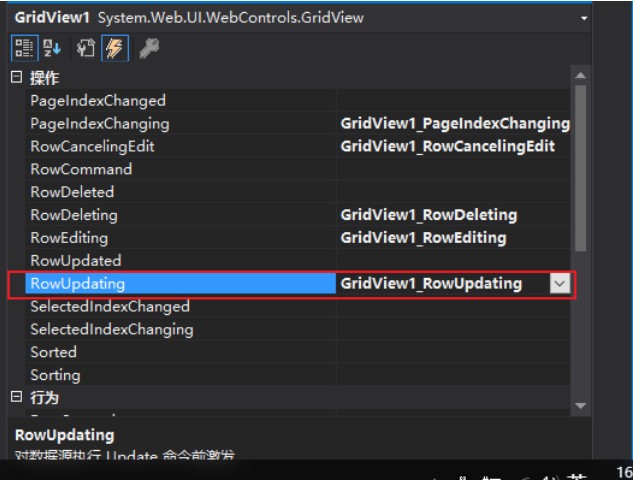
首先绑定 key值 值为数据源里的属性
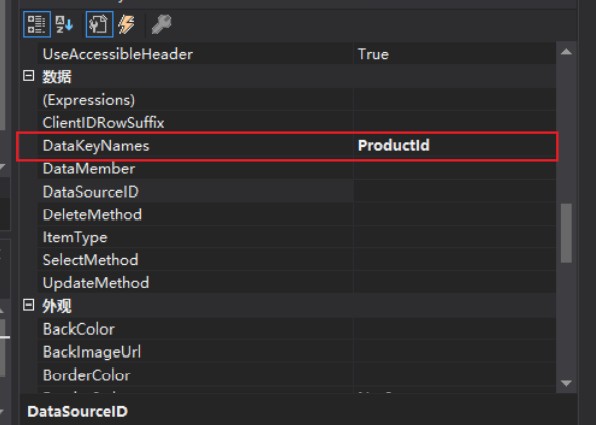
再执行对应操作

取消编辑则生成 RowCancelingEdit方法

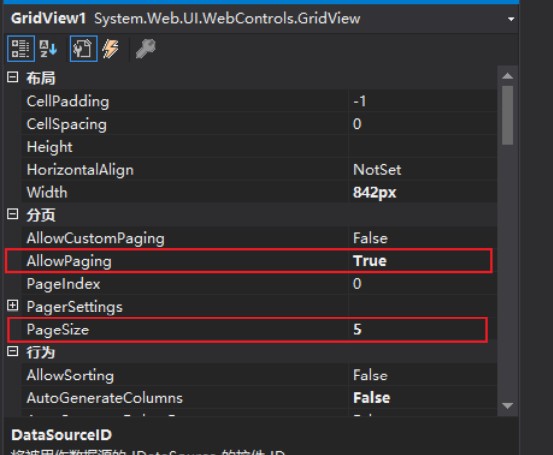
- 分页
设置允许分页 与分页大小
生成页数切换的方法
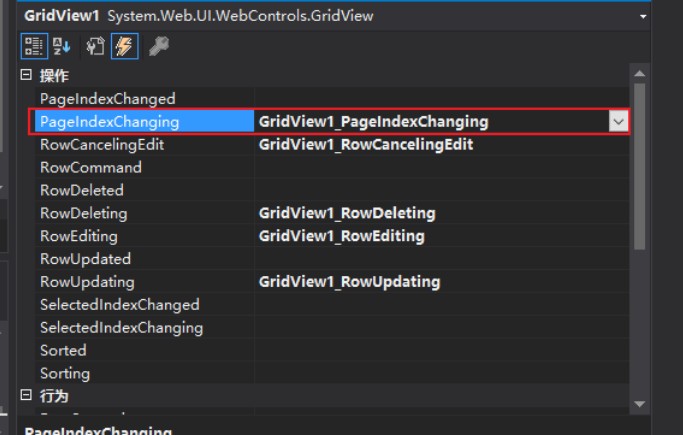
将当前所选择页数 更换为所显示的页数


